Satellite Imagery with RTL-SDR and GOES 16
Receiving full disk images of the Earth from GOES 16 with an RTL-SDR and a 2.4 GHz Parabolic Grid Antenna

👋 Heads up!
This article was originally posted on my old website in April of 2019. While the general process of receiving images from GOES 16 won’t have changed, the software tools may have evolved since then. Make sure to read the documentation for
goestoolsand don’t copy and paste any terminal commands below without fully understanding what you’re asking for!
Introduction
After stumbling upon the online communities around software defined radio (mainly the RTL-SDR Blog and the RTL-SDR subreddit), I discovered it was possible to receive high resolution, full disk images of the Earth from NOAA’s GOES satellites using cheap and simple (relative to most other satcom systems) hardware setup. Since I’m located in the Northeastern United States, I’ve got a pretty good view of GOES-16, so I decided to see if I could actually manage to set up a receiver.
Hardware
Based on a few guides I found online (see Notes below), I determined that I needed the following hardware:
- Raspberry Pi 3B+.
- An RTL-SDR software-defined radio dongle.
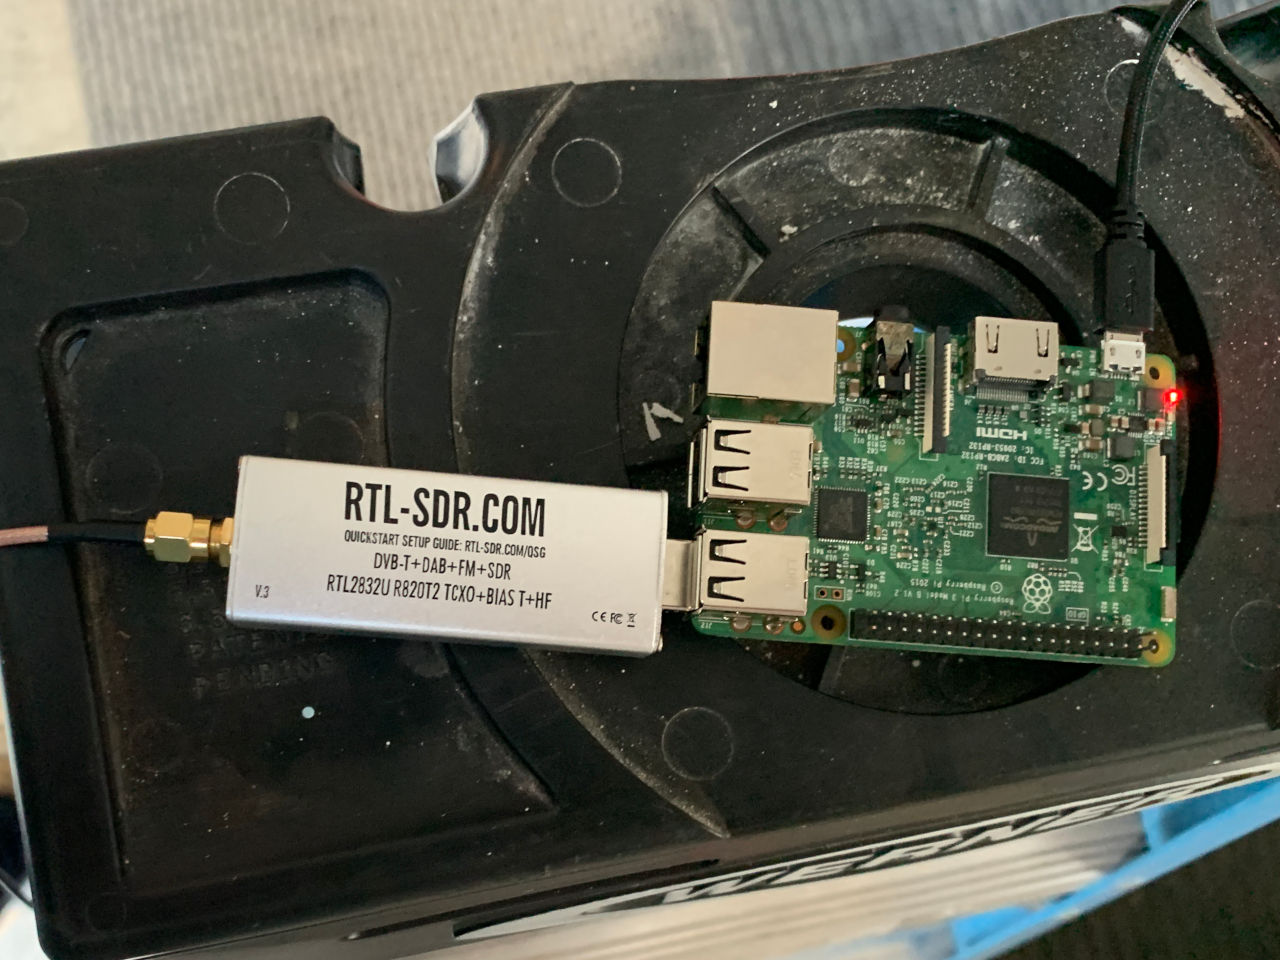
- A low noise amplifier (LNA) and SAW filter designed for the frequency that the GOES satellite uses (around 1.7 GHz). I used the SAWbird+ GOES Barebones from Nooelec.
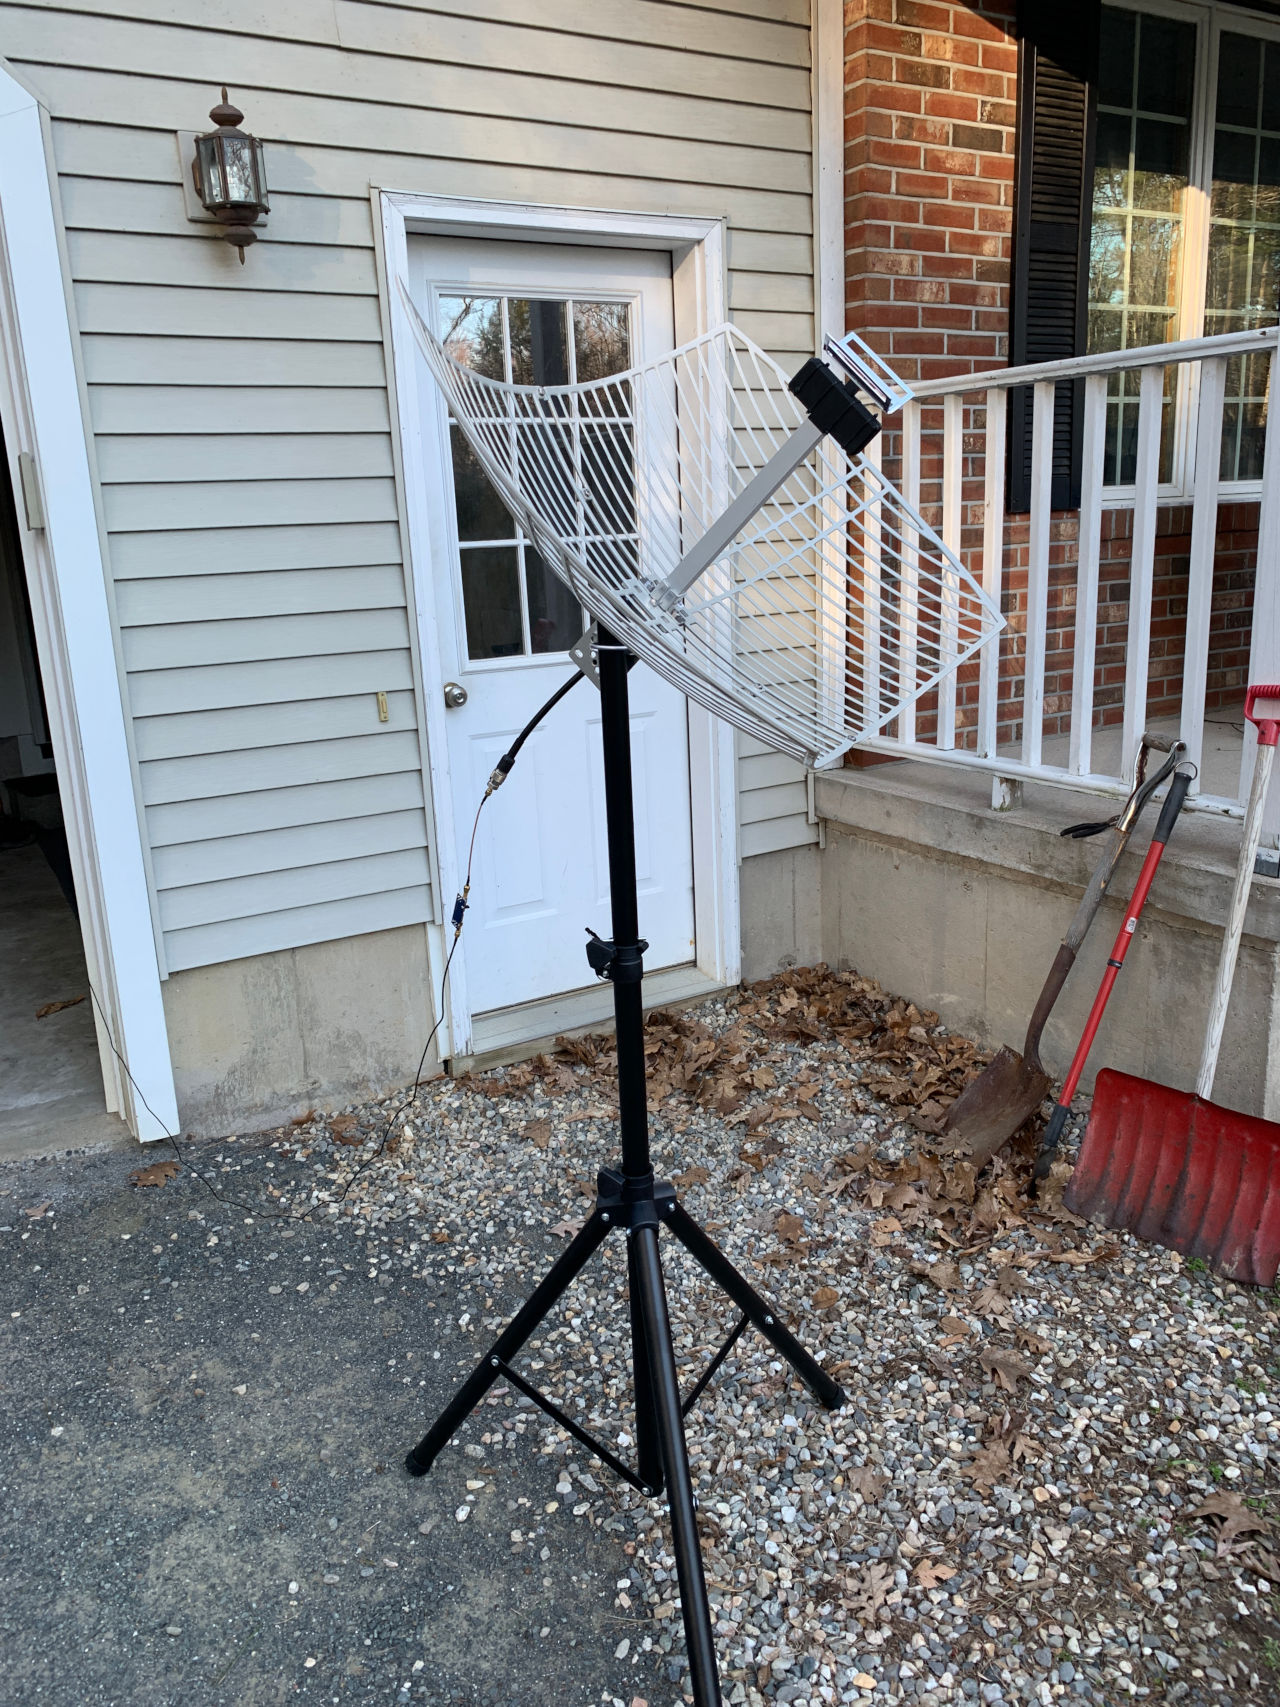
- A 2.4 GHz parabolid grid antenna modified for 1.7 GHz.
- Various RF adapters and coaxial cables needed to connect everything together (depends on the specific setup, see Notes below).
Software
To setup the software side of things, I followed lxe’s guide, summarized below.
Prep your Raspberry Pi and install necessary drivers and software.
0. Get your Raspberry Pi ready
- Download Raspbian Lite Image and Etcher
- Use Etcher to write the image to the SD card.
- Mount the SD card as a volume on your machine.
- Follow this procedure to configure WiFi and SSH.
- Plug the card into your Raspberry Pi and turn it on.
- Find the IP address of the Raspberry Pi using your gateway/router administrative interface.
Now you can SSH into your Raspberry PI as
piwith a default passwordraspberry.1. Get everything up to date
From now on all commands should be run on the Raspberry Pi.
sudo apt update
sudo apt dist-upgrade
sudo reboot
2. Install dependencies
sudo apt install git build-essential cmake libusb-1.0 libopencv-dev libproj-dev3. Install
librtlsdrGrab the latest librtlsdr source, compile it, and install the shared libraries/includes.
git clone https://github.com/steve-m/librtlsdr.git
cd librtlsdr
mkdir build
cd build
cmake -DCMAKE_INSTALL_PREFIX:PATH=/usr -DINSTALL_UDEV_RULES=ON ..
sudo make -j2 install

sudo cp ../rtl-sdr.rules /etc/udev/rules.d/
sudo ldconfig
echo 'blacklist dvb_usb_rtl28xxu' | sudo tee --append /etc/modprobe.d/blacklist-dvb_usb_rtl28xxu.conf

sudo reoboot
4. Test your the RTL-SDR dongle
rtl_testYou should see something like this:
Found 1 device(s):
  0:  Realtek, RTL2838UHIDIR, SN: 00000001
...
If it hangs, just press
crtl-cto exit. It doesn’t have to finish.If there are errors, or if the device is not recognized:
- Reinstall the driver from Step 3
- Ensure the dongle is secured in the USB port
- Remove all USB hubs and plug in into the Pi directly
- Make sure you power your Raspberry Pi with at least a 2.5A power supply
- Check the device using
lsusbcommand. You should seeID 0bda:2838 Realtek Semiconductor Corp. RTL2838or something of the like listed there. If not, try the previous steps.- Run
dmesgand check for errors such aserror -71related to the USB device. This may mean that your RTL-SDR receiver might be broken. This happened to me, so I ordered another one, which ran fine.5. Install
goestoolsgit clone https://github.com/pietern/goestools.git cd goestools git submodule init git submodule update --recursive mkdir build cd build cmake -DCMAKE_INSTALL_PREFIX:PATH=/usr .. sudo make -j2 install6. Create
goesrecv.confconfigcat <<EOF > ~/goesrecv.conf [demodulator] mode = "hrit" source = "rtlsdr" [rtlsdr] frequency = 1694100000 sample_rate = 2400000 gain = 5 bias_tee = false [costas] max_deviation = 200e3 [decoder.packet_publisher] bind = "tcp://0.0.0.0:5004" send_buffer = 1048576 [monitor] statsd_address = "udp4://localhost:8125" EOFIf you’re using a NooElec SmarTee dongle with an always-on bias tee, or if you’re powering your SAWBird through the micro USB port, set
bias_tee = falseunder[rtlsdr].If you’re using RTL-SDR.com dongle, set
bias_tee = trueto power the SAWBird board.7. Roughly point your antenna at the satellite
Find where the GOES-16 or GOES-17 satellites are in the sky at your location using agsattrack.com.
Note the azimuth and elevation.
Use an actual real compass to point your dish at the azimuth. I’ve been using the iPhone phone compass, which has a 20-30 degree error, rendering it practically useless.
Adjust your dish angle according to the elevation.
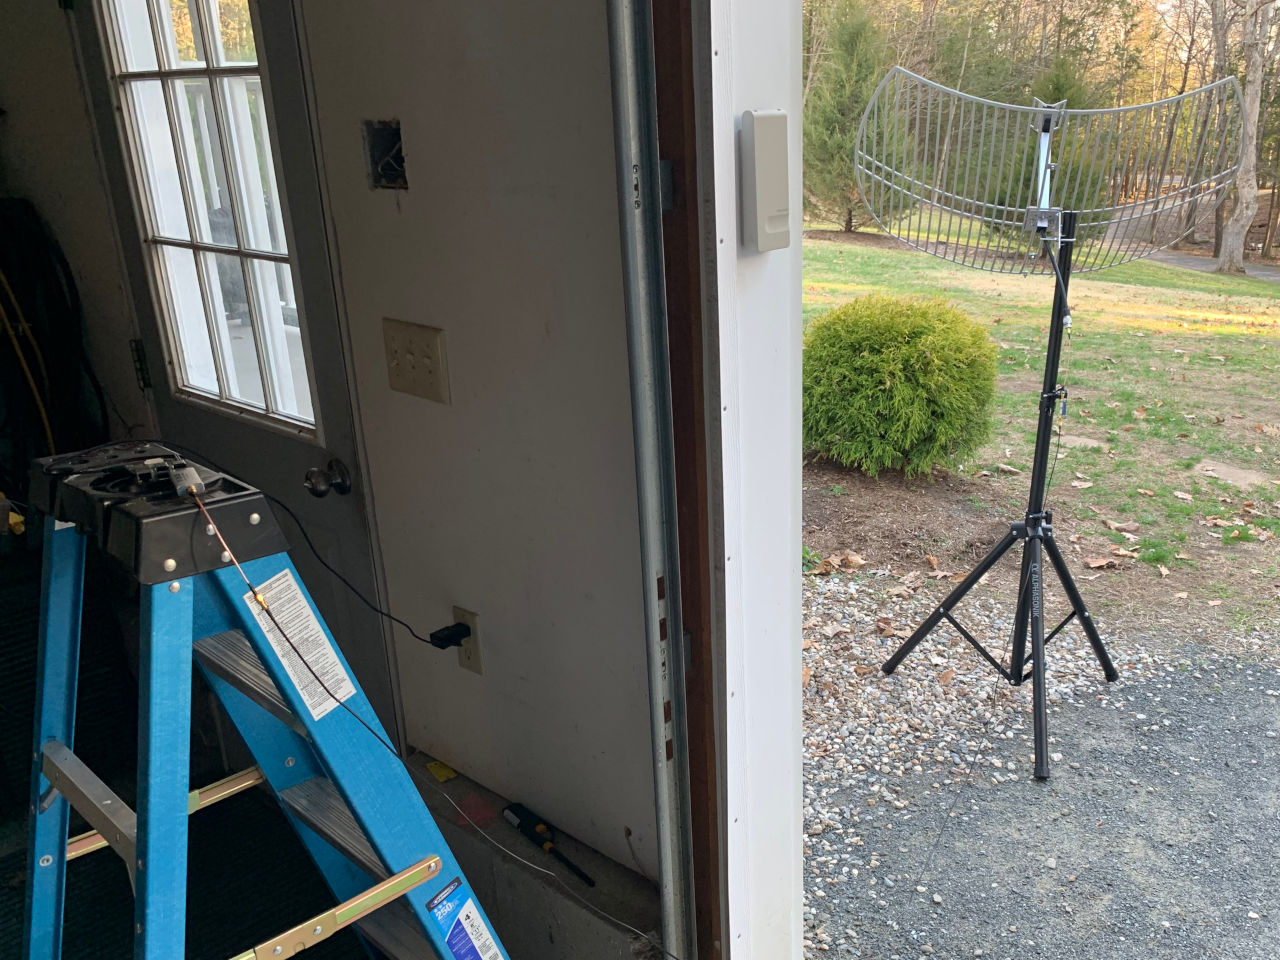
8. Run goesrecv and perform fine antenna adjustments
goesrecv -v -i 1 -c ~/goesrecv.confThis will show output every second that looks something like this:
...
2018-09-15T21:52:03Z [monitor] gain:  8.44, freq: -2121.4, omega: 2.589, vit(avg):  2400, rs(sum):  0, packets: 0, drops:  55
The
vit(avg)stat shows the average viterbi error rate over 1 second interval (if running with-i 1).If there’s no signal, the
vitvalue should be over 2000. When signal is stronger it should decrease.This should help you point the antenna correctly. Slightly rotate the dish right or left and note whether the
viterrors are increasing or decreasing.Once you’re at the local error minimum, perform the same process to find the minimum error rate while slightly adjusting the vertical angle.
When the
viterrors are at their lowest, you’ve pointed the antenna. Double check the antenna position again with a compass to make sure you’re pointed at the intended satellite; GOES-17 and GOES-16 are only about 15 degrees from each other in the sky.9. Restart
goesrecvand play around with the config parameters.If your
viterrors are under 400, and you’re observing no packet drops, you’re all set!If the average errors are at around 1500-1800, try the following:
Terminate and restart
goesrecv. This should allow it to readjust the gain and frequency offset to get a better read on the signal.Cool the Raspberry Pi and the RTL-SDR dongle. I’ve noticed that temperature might significantly affect reception quality.
Play around with
goesrecv.confparameters. Try adjusting thegainandsample_rate. For the NooElec XTR or other E4000 tuners, you might need to set your gain to10or below.Once you decreased the error rates, but your
vitis still over 400, try making very slight adjustments to the antenna again.10. Process packets into images
While goesrecv is running, in a separate session, run:
goesproc -c /usr/share/goestools/goesproc-goesr.conf -m packet --subscribe tcp://127.0.0.1:5004Once
goesprocreceives enough packets, it will start writing images and text to the locations described in/usr/share/goestools/goesproc-goesr.conf.Writing: ./goes16/m2/ch13/2018-09-15/GOES16_M2_CH13_20180915T231750Z.jpg Writing: ./goes16/m2/ch13_enhanced/2018-09-15/GOES16_M2_CH13_enhanced_20180915T231750Z.jpg Writing: ./goes16/m2/ch02/2018-09-15/GOES16_M2_CH02_20180915T231750Z.jpg Writing: ./goes16/m2/fc/2018-09-15/GOES16_M2_FC_20180915T231750Z.jpg Writing: ./goes16/m1/ch07/2018-09-15/GOES16_M1_CH07_20180915T231820Z.jpg ...
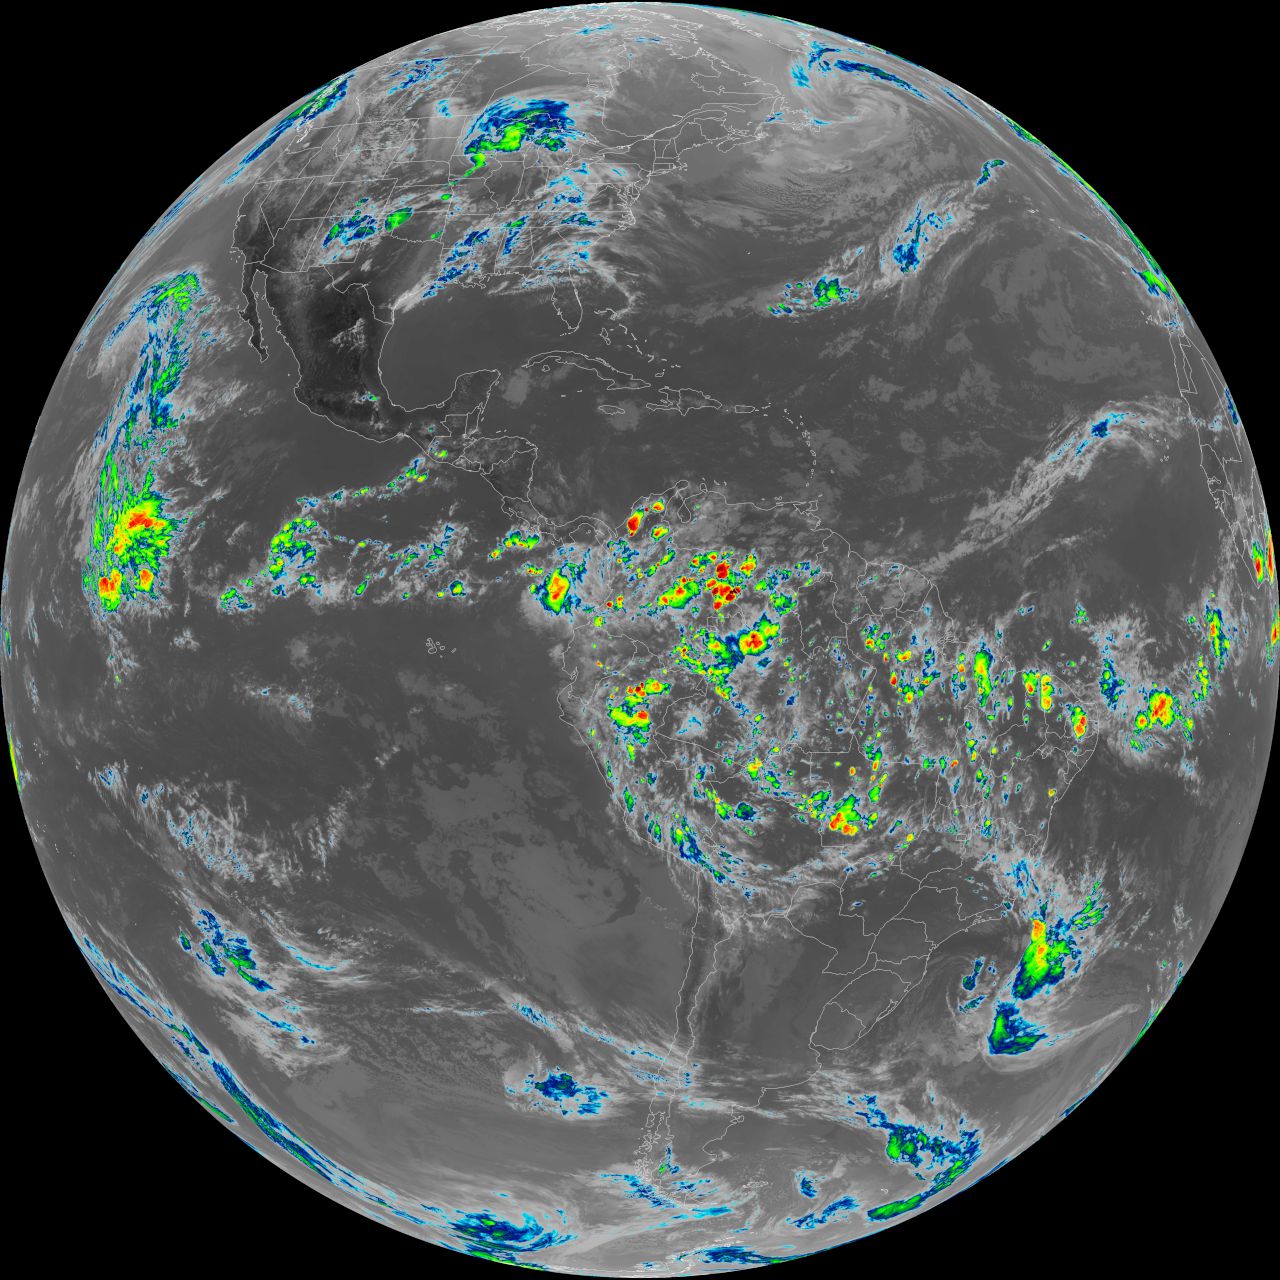
Results
Here are some of the images I was able to get off of GOES 16:


Notes
This wouldn’t have been possible without the work of a lot of others before me. Some of the most usefull resources I found about this subject are:
- Pieter Noordhuis' goestools and his guide for setting up A minimal LRIT/HRIT receiver
- This guide that goes into a little more detail about how to use goestools.
- Additionally the RTL-SDR Blog is a wealth of knowledge about anything to do with this type of software defined radio.